Thursday, May 2, 2013

Altered boxes

Have you ever gotten those beautiful smelling soaps in those little boxes that the drawer pulls out? Have you ever wondered what to do with them?
Well I had 2 of them, and I decided to put them together.
 I have a lot of the romantic novel papers , from Marion Smith, I also have some of her digital printout papers, that go with that line,
they are called vintage telegram, she also has a new digital printout, vintage telegram rolled rose .
 You can find her products here
  I used the paper line romantic novel for the main covering , then I used the digital printable extras , with the rolled rose , for the extras .
 again I took these pictures into creative suite, and changed up the background .

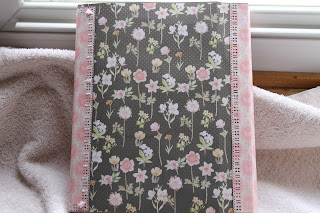
This is the left side view as you can see, I put 2 of the soapboxes together .
 Printed out the coin envelope and attached it to the left side,
 inside the envelope are 3 to 4 tags for notes.
I used a 6 x 6 paper pack which fit with just a little trimming along the side .
you can also see the drawer fronts, I had 2 leftover Tim Holtz drawer pulls and used those.
 
  here's the right side
 with the romantic novel line, you could get these mini clothespins that matched.
I attached it further back on the right side, so that I could add extra ephemera, and also give me a place for extra notes .
 I printed out the tags and stamps from Marion Smith printables and use them in the clip .
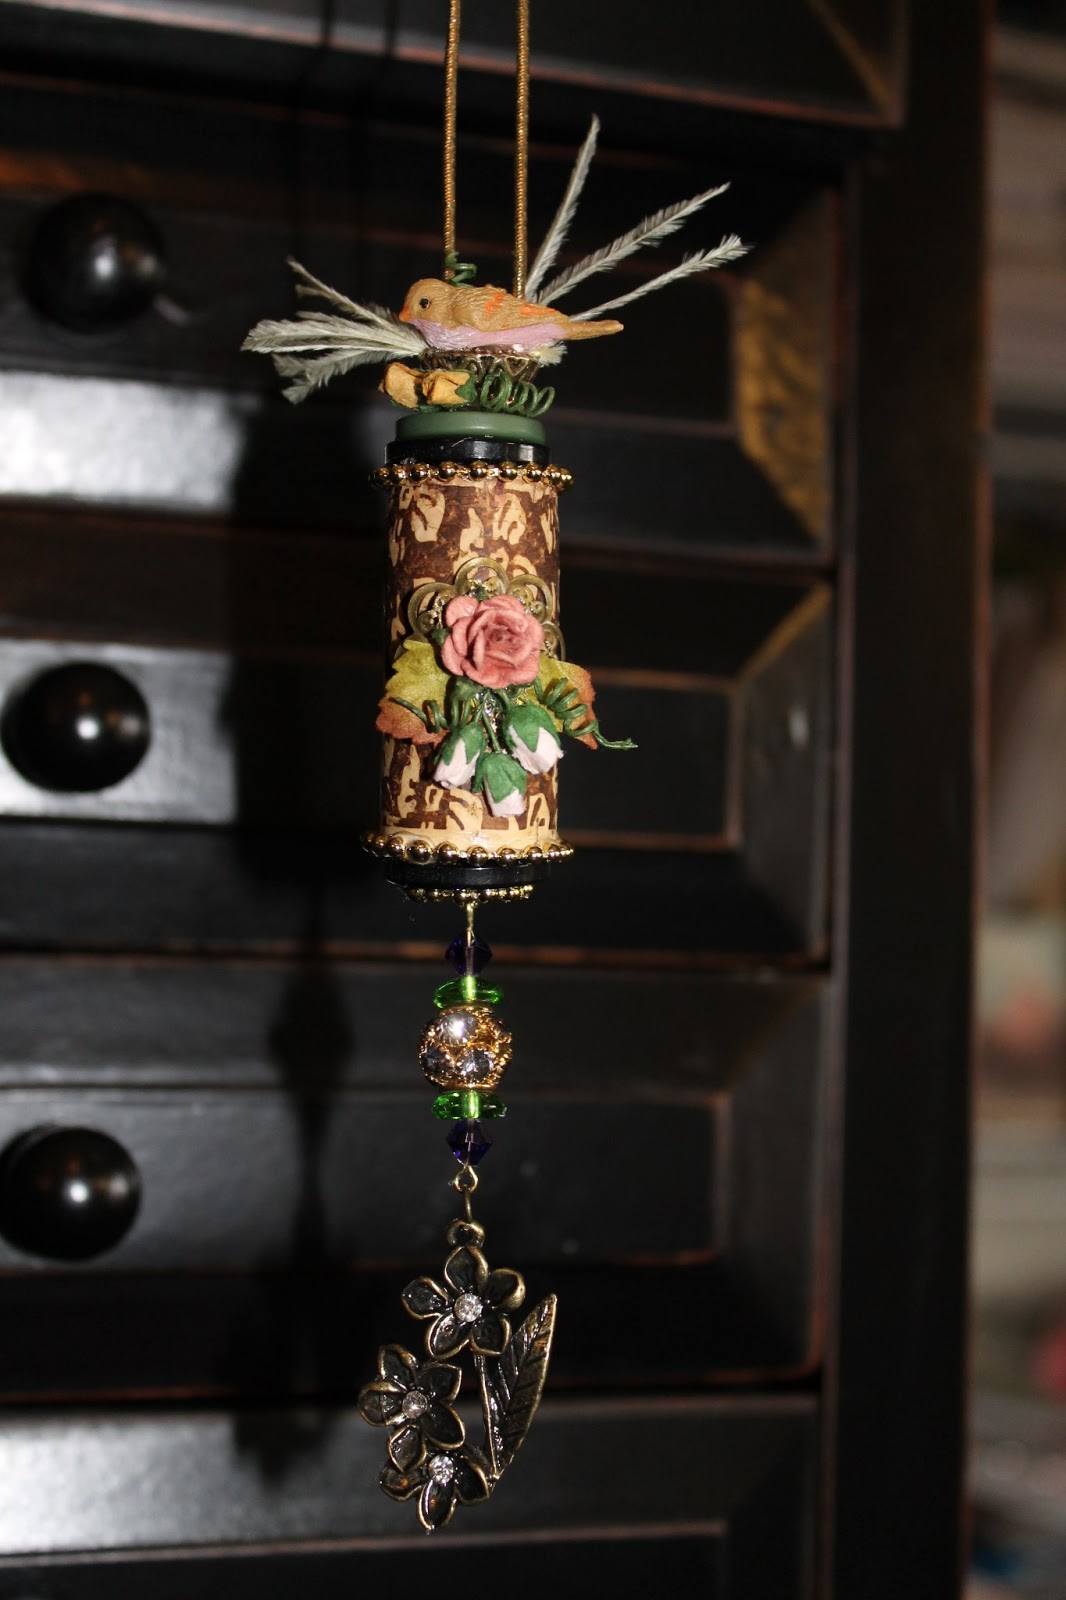

  here's the top view
 I used a tag from the paper line as the top paper, it fit perfectly .
 added some Prima pearls ,a trinket from the paper line, a little Prima rose, that I had sprayed with glimmer mist.
 Now the two large roses that you see, and also the green leaves, are from the Marion Smith's printable rolled roses.
 I love how they turned out.

 If you ever get any of those soaps that come in those cardboard boxes, with the pullout drawer.
 don't throw them out
 don't just stuff things in them and hide them away
 alter them
  you can see the possibilities are endless.
 

Another tutu

Hey everyone got another tutu done.
 If you're wondering where I get my inspiration for these, the lady over at Kell Belle,

http://www.kellbellestudio.blogspot.com/
 
has a corset diaries going on this year, and she gives you the patterns for the bodice.
While these corset diaries corsets, are gorgeous they are also basically flat paper items .  She does show you that she's made a 3-D corset , but doesn't show you how to do it .I have used her patterns added a side panel to them, to make a form. And over this form I make the papier-mâché  bodice .
 which I then cut off the form,and then in this way I can reuse the form.
While hers are all basically paper , . The only part  of mine that is paper, is the bodice and then I use ribbons, and tulle, and lace . . Basically I make it my own .
 Also instead of just posting regular pictures , I took my pictures into creative suite, and there did a little fussy background with them , so I hope you like it and here's my pictures .

 
Here she is
The front view.
 I think I will call this one
Willow Fae.
 she is decked out with the papier-mâché bodice of ,   
 ivy green, being the upper part, with a mauve under bust, then over these colors are rubbings of perfect pearls copper dust . She has a chocolate tulle skirt, with a mauve floral ribbon, below the waistline, and as the shoulder strap . She also has 2 wild orchid miniature roses, at the center front waistline . . At the very top of the under bust is a row of mauve liquid pearls.
( by the way the hanger is a Kell Belle project, she has the tutorial on her site .)

 
 Okay here's the back view
 I have the bodice being laced from the top to the middle, and from the bottom to the middle so the bow is in the center of the bodice.
 I used seam binding that I colored with sugar Maple and vintage pink glimmer mist .

 
 this is a side view just showing how dimensional this tutu is . 
The bodice itself is 3 inches high, and the overall tutu, from the top of the straps to the bottom of the tulle measures 10 inches.. So this is pretty good-sized.
 

Monday, April 15, 2013

I made this tutu out of paper mache, ribbon, little flowers, and trims.
I think it turned out beautifully.
Front view
I did paint the paper mache dress part

side view
 I got this by using wired ribbon and cutting the wire part off at the top, and then flaring the pleats out that I put into the ribbon before attaching. I also added gathered tulle under the ribbon


And the back view
 I drilled holes through the dress form, and after putting on the skirt ,and bodice trim, I then threaded the seam binding through for the tie.
I am  going to make more of these. And can't wait to see how they turn out.


Got some more cork ornaments done

I just love doing these. It's also neat when you go to drill the hole through the cork you can smell the wine. Yum.


All you need is a string or chain, buttons, charms, beads and glue.
And the main item A wine cork

Sunday, April 14, 2013

Vintage camera


So did a video this time. to big a project for pictures. Hope you enjoy.
This is a Paper Phenomenon, and a family history saving project.
 

Thursday, April 4, 2013

SHORT PROJECT

So I saw these Cork ornaments on Pinterest, and I thought they were gorgeous. One thing nice about them, is you get to enjoy drinking a bottle of wine to get the Cork. So I decided to try it and here is a picture of what I came up with.
I think my favorite is the one with the birds nest at the top, although the bee is pretty neat.
Okay you're wondering what you do with these besides just hanging them around. well you put them around the neck of a wine bottle, would that not  make a terrific gift, a bottle wine, and a wine cork ornament, in a wine box. Now my mind is going. And I'm going to have to figure out how to do a wine box. So I hope you like the picture. Please ignore  that little section hanging down from the bee on the right hand side . I hadn't taken the heat gun to it to get rid of all the glue webs ,but it's gone now.

Wednesday, March 13, 2013

February's bonus project 2013

So I just finished my paper phenomenons February 2013 bonus project the paper that I used is DCWV the butterfly garden. Shown below are some of the pages of this awesome project. It took me three days to complete this. The first day I cut and scored all the pages, the second day I put it together, and the third day I matted.
 This is the front of the project. In it's folded position
 
 Close-up of the Tim Holtz pins that I used as a closure for the flap
 
 This I'm showing opening the flap and there is a large 8 x 10 photo Matt in a pocket
 
 Here is the first page completely open, on the far left with the yellow paper is the photo Matt that's in the pocket, in the center is an other photo Matt, what you see on the far right is the flap that closes the unit up.
 
On opening it up one more time.You see to the left a pocket with the black photo Matt, three pockets in the center with three black photo Matt's, two more little pockets that will hold luggage tags on both sides of he centr matts. On the right you can see that there's another section to be opened.
 
This is what you see when you open the second section, you see there are six little pockets with six black photo mats, and I just put a stationary photo Matt in the center of the bottom . To the right of that is another pocket with the another black photo Matt

 Then if you flip the page one more time, you see this section which are six little flip pockets with the pink photo mats that come out  

When you flip all of those open, it reveals another section, that has six photo matt pockets, and behind those are pink  photo mats, that slides completely out .
 
And then finally closing it all back up. you see the back of the project.
 There are so many areas, in which to place photos, and journaling, that you'll find yourself opening and closing this book alot.This was a very fun project to make .